Search This Blog

I am a quilter living in Woodbridge, Suffolk who has made quilts since I was a teenager. I also ring bells! Both are great British traditions....I will try to feature some of my antique Welsh and Durham quilts, the quilts I make myself, my quilting activities and also some of my bellringing achievements. Plus as many photos as I can manage. NB: Double click on the photos to see greater detail, then use back button to return to the main page.


Thursday, 21 February 2013

Stamped quilt on Ebay

I spotted this Durham quilt for sale on Ebay not long ago - it looked somehow rather familiar...
Does this remind you of anything? I featured a quilt find of mine in November 2011 which I was able to link to the Mary Potts quilt at Beamish (with Lilian Headley's help)....similar templates and borders had been used - and this quilt is very similar to my quilt, and must have been marked out by the same quilt "stamper".


Its difficult to tell from the photos what the border is like - it may be a hammock but it is difficult to see. I put in a bid but it was bettered by another bidder. Just as well - I don't need two quilts the same! However, I was surprised to see it surfacing a few days later, at the Antique Textiles Company in Hampstead - I wonder what the markup will be? The winning price was £155....

 Here is my red quilt - you can see that the centre is the same----

 ...and the little hemispherical feathers are the same...
the feathers are the same templates...


but it didn't look as if the borders were the same.....


I have been asked to step in as a speaker for a Quilters Guild Area Day at Copdock (near Ipswich) Village Hall on the 20th April 2013. I will be showing some of the quilts that went to Minerva, Llanidloes last summer. So if you didn't get to Wales, here is your chance to see them!

And - good news. I was worried as Tom lost his job soon after the wedding in January - due to immigration laws, we thought Lily might have to return to Japan until things were more certain (there being strict immigration laws on being able to support your spouse). It now seems that Lily will have been in the UK for ten years, and will be able to gain a new visa that way - and the best news, Tom has a new job which he starts on Monday! Things sometime do work out for the best....and I can stop worrying...

Thursday, 14 February 2013

Hawaiian Quilt in the Frame

Over the holidays, I was able to baste my blue and white Hawaiian quilt and start to quilt it. The name is Molokama, but it is different to the previous pattern of that name that I made in red and white.

 Here it is in the frame, I find these Qsnap frames really good. I do have an older frame as well as its newer replacement. You can see that I do use the older caps, especially the shorter one - they are split! but rather looser, which suits my purpose in some cases.

The quilting for these Hawaiian quilts is tradtionally echo quilting, which looks very atractive...


The first job is to outline the applique pieces. The applique is also quilted, but as there is an extra layer of cloth, it is not so easy to create small stitches. Ther dark blue colour of the applique cloth is also difficult to stitch.


As usual, I am not marking with a pencil or other marker, instead I use a line of straight pins, set at 1/2 inch using a small ruler. This I find much easier and of course there are no markings to get rid of.....

Monday, 11 February 2013

Trip to York - Guild Website Training

At the weekend, I went to York for a Quilters Giuld training day. The Guild has commissioned a new website, and the purpose of the day was to walk us through the new website, and then transfer as much information from the old website to the new website. Numerous glitches meant that the new website is unlikely to go live for some weeks....but the intention is to make it as lively and attractive as possible......

Each region and specialist group sent a delegate - I was there with Aidan Nichols, who runs our BQSG website. I think that most people managed to do quite a bit during the short time that we were there. Of course once the new site goes live, the content of the old site will be lost, hence there is some urgency about the transfer. Here is my early morning view of the minster while I walked to our meeting point....


Although many of the others stayed at the Bar Convent, I stayed at my favorite guest house, the Abbeyfields, which is not far from the train station on a quiet road.


The venue for the day was the local FE college, York College, in one of their IT classrooms.


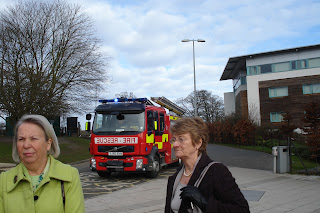
Our morning session was rudely interupted by the fire alarm; we duly exited the building. A fire engine attended, only to find that there had been a fault with the fire alarm system...

Fortunately, BQSG has its own website, so the transfer of data is not such a pressing issue for us, although of course we want our section to appear as attractive and informative as possible. In reality, each of the regions and special groups will have their own website, which will join seamlessly with the rest of the site. There is also a new area, the Members area, where all paid up Guild members will have their own page, to add information, advertise teaching and upload photos. This will replace the existing teachers list.

At the end of the day, there was a taxi to take us back to the train station...as my train was not due for another two hours, I went across to the nearby National Train Museum (free entry)

The blue locomotive here is Mallard.....


and here is a 1930's model of Stephenson's Rocket, the earliest engine....although this is a dissected model, so that you can see how it worked by looking into its innards.....my friend Colin French from Cornwall was very involved with the recreated Trevithicks Steam Engine, so I found this early machine interesting....

Friday, 8 February 2013

Papercut Appliqué Blocks Using Freezerpaper

For Mrs. Iwata's gift, I chose to make an applique pillow. I used my favourite applique method, in which a papercut freezer paper pattern  is ironed on to the top of the applique fabric and pinned into place on the background fabric.


The book that I took down off the shelf was "Papercuts and Plenty" by Elly Sienkiewicz which has a wealth of patterns to choose from.


Taking a large square of freezer paper, fold carefully into quarters, taking care to match edges and making a crisp fold (remember your origami skills?) Then fold into eighths...


Many people then label the centre and edge of the folded paper, to aid in the tracing and cutting. If you orient the paper wrongly, the papercut will fall apart, as we have all experienced!

Unfold the paper and lay down on the pattern with glossy side downwards. Match up the creases with the edges of the marked pattern. I chose this pattern but please note - it is NOT a beginner's choice as the seam allowances are very small - better to choose a simpler pattern if you have not done this before! Trace the pattern onto the dull, matt side of the paper with a pencil.

Refold the paper, the drawn pattern should be outermost. Staple the shapes so that the paper does not shift during the cutting.

Then cut out the paper pattern - remove staples and unfold your papercut pattern...


For my applique fabric I chose some hand-dyed Kona Cotton pfd fabric - I dyed a lot of this at one point, especially greens, and still have quite a stash left! It is crumple dyed, which leads to interesting mottled effects. Carefully iron the freezer paper pattern onto the right side of your chosen fabric - flip over and iron from the back as well to make sure that the pattern is on securely...


Centre the applique fabric onto your background fabric and smooth out - then carefully pin the shapes. The fabric appears rumpled due to the number of pins - but will lie flat on the completion of the applique...


This method of applique is known as "needleturn applique" and is very easy to do once you get the hang of it. The edge of the paper pattern is an easy guide to the applique and peels off afterwards. Trimming the fabric a little at a time, so that there is a small turning allowance, the needle sweeps the excess fabric under so that it can be whip stitched in place. I use a quilting needle - your thumb and fingers act as a vise, pinching a fold in the fabric (once it looks about right) and holding it in place as you stitch. As I am right handed, I work from right to left, using fine tacking stitches in a matching coloured thread.


Here is the partly completed block - I purposely used quite a large background square, so that I will have plenty to work with when it comes to making up the cushion. The freezer paper can be cut away as you go, as it tends to get in the way once the applique is completed. I find these blocks very relaxing to do, and they can be picked up and set down as needed. I'll show you the completed block later.

Sunday, 3 February 2013

Wedding Gifts

At Tom and Lily's wedding, as is the Japanese tradition, I was given some lovely gifts by Lily's family .


I was given these lovely dolls, each dressed in traditional kimonos, and with a music box inside. I would love to know more about these - and to know the tune! Each is wearing a little crown - what can that mean?


I was also given a lovely lacquer bowl,  with cloth napkins. In addition, there were traditional bean paste cakes.

I would like to send a thank you letter, with a gift - it is usual to reciprocate with gifts of equal value - however, I would not know enough to be able to do this. Instead, I have decided to make a hand made gift - a paper cut applique block- and I decided to do this block :


...it is from the book "Papercuts and Plenty. Here it is on my Millennium Quilt - I really enjoyed  making this block, and hope that it will make up into a nice cushion.

I took a series of photos, and in the next post I'll show how to make a papercut applique block.